By Ben Nitkin on
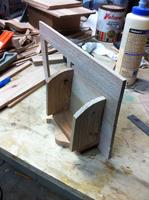
 The first day of construction left me with a set of planks. Two sides, a back, and a queer-looking front. The front has a few pivoting drawers: pressing on the bottom of the drawer will swing the top forward and out. Since the drawers push to open, no handles are needed, so the front can be perfectly flat. It looks slick (see illustration 1).
 With the panels made up, I went back to gluing things together. The drawers were first. I cut sides for the drawers out of short lengths of scrap. I drilled holes near the bottom front of the sides to ensure that the drawer center of gravity would fall behind the holes (that way they close automatically). Then the bandsaw rounded over the top of the sides (they'll look really slick when they open and close). Then I glued the sides of the drawers onto the front faces and let it set.
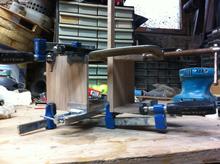
 With many clamps.
Many, many clamps.
All of the small clamps in the workshop.
Next, I clamped the box together. Before clamping, I used the router to cut a half-lap into all sides of the planks I'd prepared, then decided how to line up the sides. A pair of clamps and some wood glue finished the box. The half-lap is visible in the picture. You can clearly see how the plywood will fall.
The most time-consuming part of woodworking, I think, is waiting for the glue to dry. And as it's said, a watched pot never boils. So that's all for tonight, lest the glue boil.